This is the write up for the Room Introduction to OWASP ZAP on Tryhackme and it is part of the Web Fundamentals Path
Make connection with VPN or use the attackbox on Tryhackme site to connect to the Tryhackme lab environment.
Task Introduction to OWASP ZAP
Task 1
Start the machine attached to this task and read all that is in the task
1.1 What does ZAP stand for?
The answer cannot be found in the task. One google string revels the answer

Answer Zed Attack Proxy
1.2 Connect to the TryHackMe network and deploy the machine. Once deployed, wait a few minutes and visit the web application:
When navigating to the site we see the following

Press complete on the task
Task 2
Read all that is in the task and press complete
Task 3
OWASP Zap is already installed on Kali Linux
Press complete on both questions
Task 4
Start up OWASP Zap and press Automated Scan
Fill in the Adress of the machine http://MACHINE_IP and press attack
You see the result belog on the left

Press complete on the task
Task 5
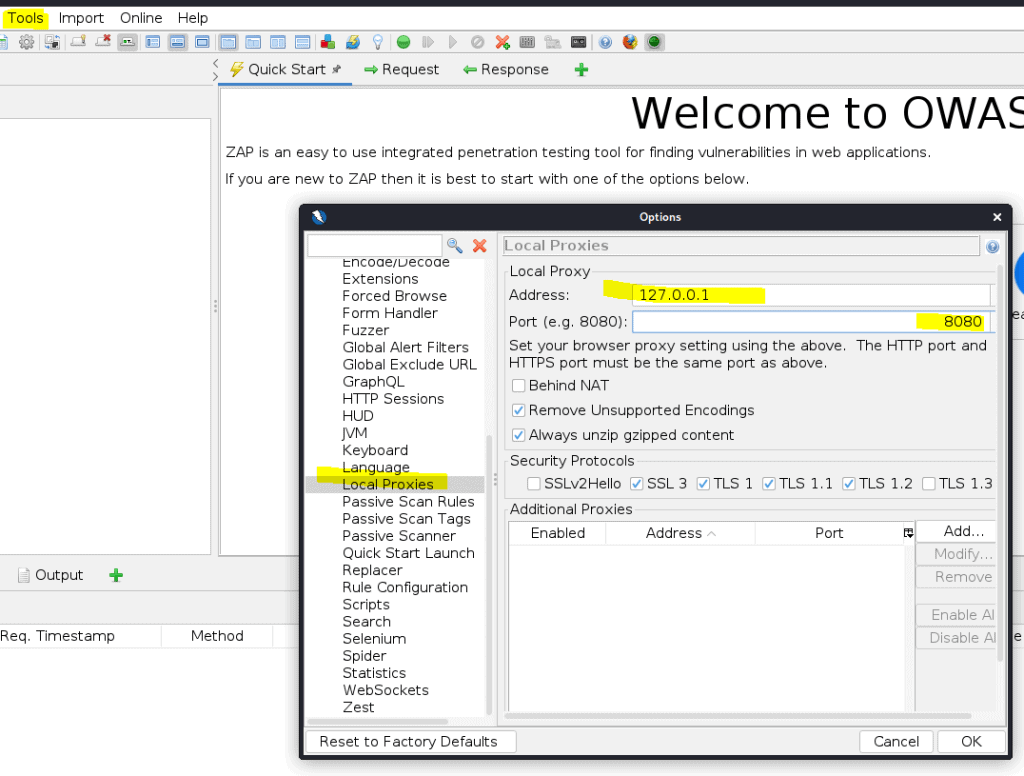
Open ZAP then go to tool -> options.
Tell ZAP to use 127.0.0.1 and use port 8080

In the same screen navigate to Dynamic SSL certificates

Press save
Open firefox and go to about:preferences

Click on View certificates
Click on import and import the certificat we just saved

Make sure you select to trust

Now install the foxyproxy plugin in fire fox if not done so already
Open Foxyproxy and click on options
Add a new proxy

Now activate ZAP with foxyproxy

Now you can switch between Burp and ZAP
What IP do we use for the proxy?
Answer: 127.0.0.1
Task 6
Go to the DVWA machine (MACHINE_IP), and login using the following credentials:
Username: admin Password: password
Once logged in go to the DVWA security and put it on Low

Now go to ZAP

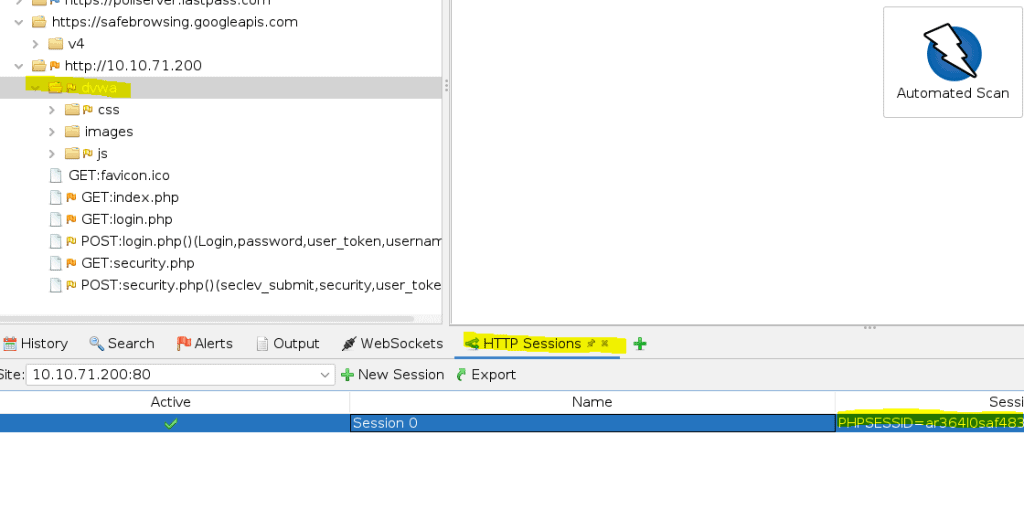
Add the HTTP session by clicking on the Plus sign. One you see the PHPSESSIONID -> right mouse click and select active
Now press the Automated scan again and notice it is scanning allot more then the previous tasks
Task 7
To brute force we need a word list. Kali comes with allot of wordlist. Open the option under tools in ZAP

Now that the wordlist is installed we can use it.
Add the attack

And select the word list and press play

Press complete to go to the next task
Task 8
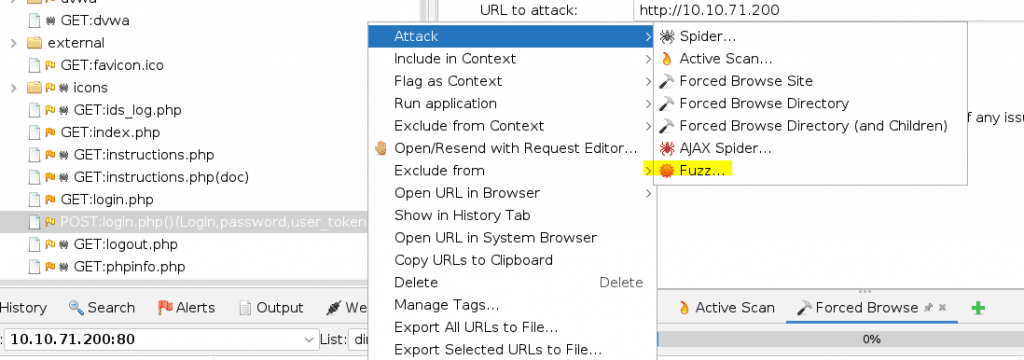
Select the post login and select the FUZZ attack

If you do not see this in your list then try to login first.
Select the password then click on add and select file. Add the fasttrack.txt password list

Then press the play to start brute forcing
Task 9
In Zap open the market place

The install Python Scripting and Community scripts

Now in Zap open Scripts and add a new script

Now when browsing a site HUNT will passively scan for SQLi, LFI, RFI, SSRF, and others.
Press complete when done
Task 10
Read all that is in the task and press complete


